

Tips and Tricks eBlast:
Imports & Exports Edition
Export Employee Information
Have you ever needed to compile a list of specific information about your employees? The Export Employee Information utility provides the tools you need to customize and export the exact information about your employees you need. Utilizing this export is a two step process, you must (1) create the Export Definition, which can be used repeatedly, and then (2) determine the range of employees to be exported. You can find Export Employee Information in the Utilities Menu, where you will be required to select a Pay Group before creating your Export Definition (Image 1). The Export Definition will determine which fields you will be exporting, which could be as simple as a list of names of employees and their addresses (Image 2). To define the Export Definition either Modify an existing definition or create a New one. When creating a new definition, first create a unique Key and a Description, and then you can begin to input fields you want exported by either typing the number into the column field or dragging them over with your mouse (Image 3). The order you put them in is how they will export into a .CSV file. After you’ve created the definition you only need to select it and then select the range of departments, employees, hire dates and other features you may want to limit the export by. If you leave these fields blank, you will export everyone in the departments you have access to.
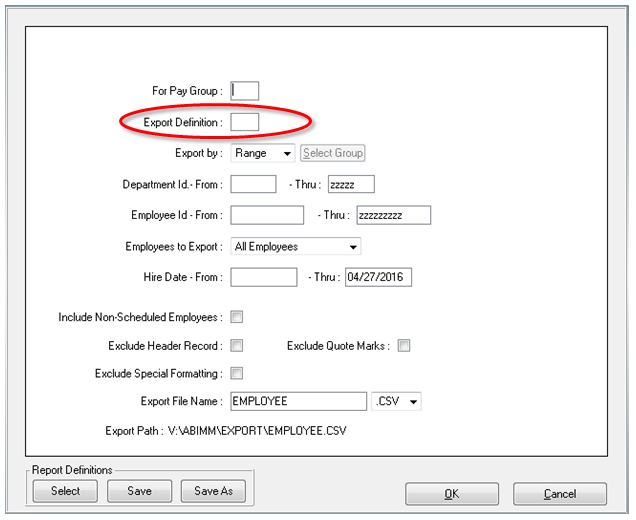
Image 1
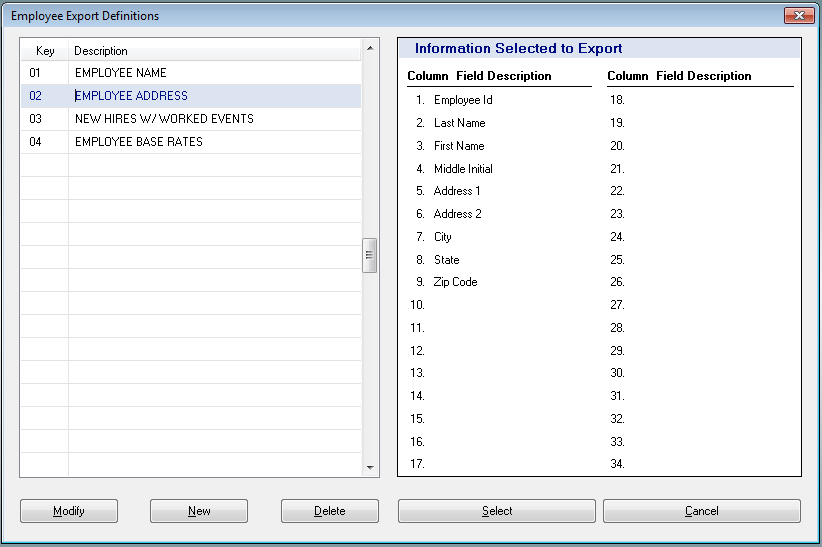
Image 2
Image 3
Tips / Commissions Import
Are you paying out tips, commissions, or service charges to your employees, or even just tracking their cashed out tips? No matter how this information is initially recorded, a spreadsheet can be imported directly into ABIMM. The document must be in a .CSV format by placing the columns in the following order (seen in Image 4 below). Then select which identifier you will use to import (Employee ID, SSN, or Card ID), the applicable event, and the specific WIP date (if it is a recurring event). Check the fields to be updated (depending on which information you have recorded) and remember to process time in order to apply the tips.
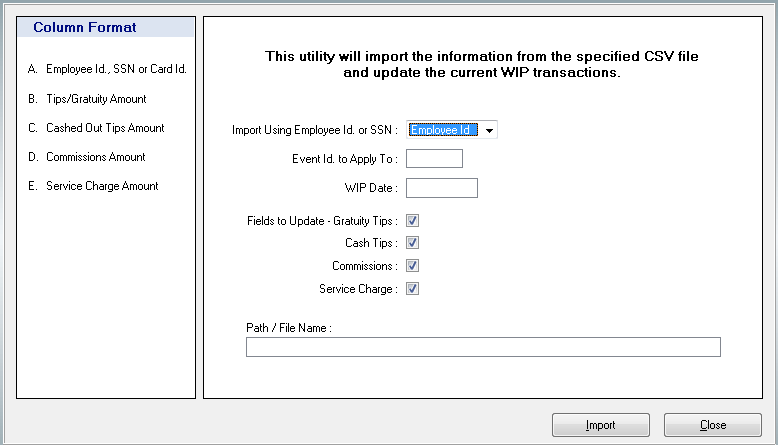
Image 4
Merge Tag – Notes Listing
Have you found yourself entering information from ABIMM reports into your own corporate templates, and wishing you could just import it and avoid the manual entry? Merge tags are your answer! Merge tags allow you to send information from specific ABI reports to a pre-made Microsoft Word template. For employee notes, you can use your note types to fill in a letter concerning issues such as multiple late shifts or no shows. To create this document you’ll need to utilize the list of merge tags, which can be viewed from the Merge Tag List button in Employee Notes Listing (Image 5 and 6). They will need to be entered into a document, which must be saved as an .RTF file (Image 7). Finally you must select the Output Type as Merge Doc and select your template. For an in depth guide on Merge Tags and to learn other reports they can be used in click here.
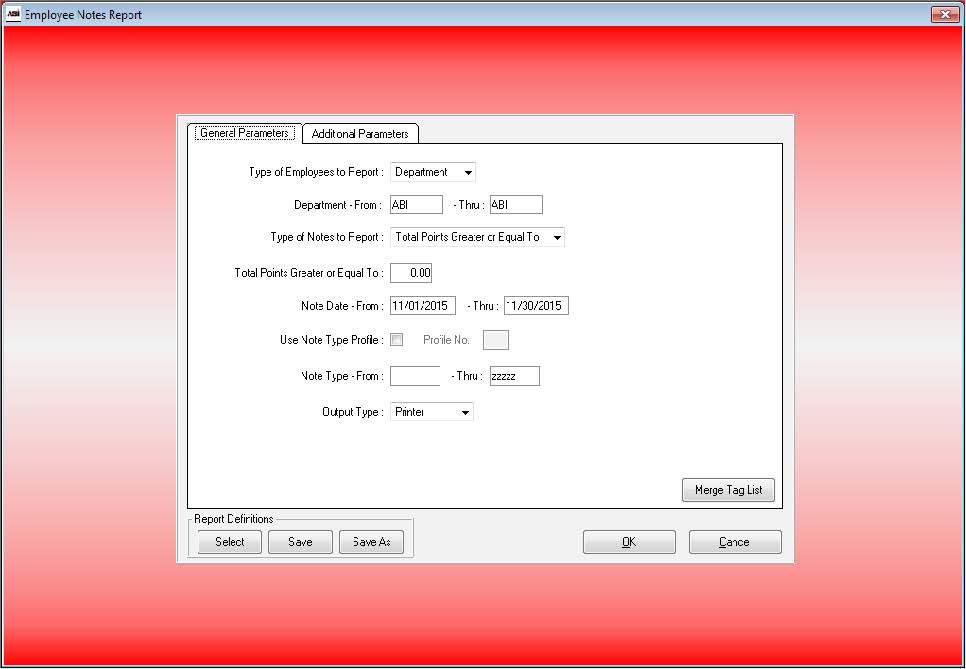
Image 5
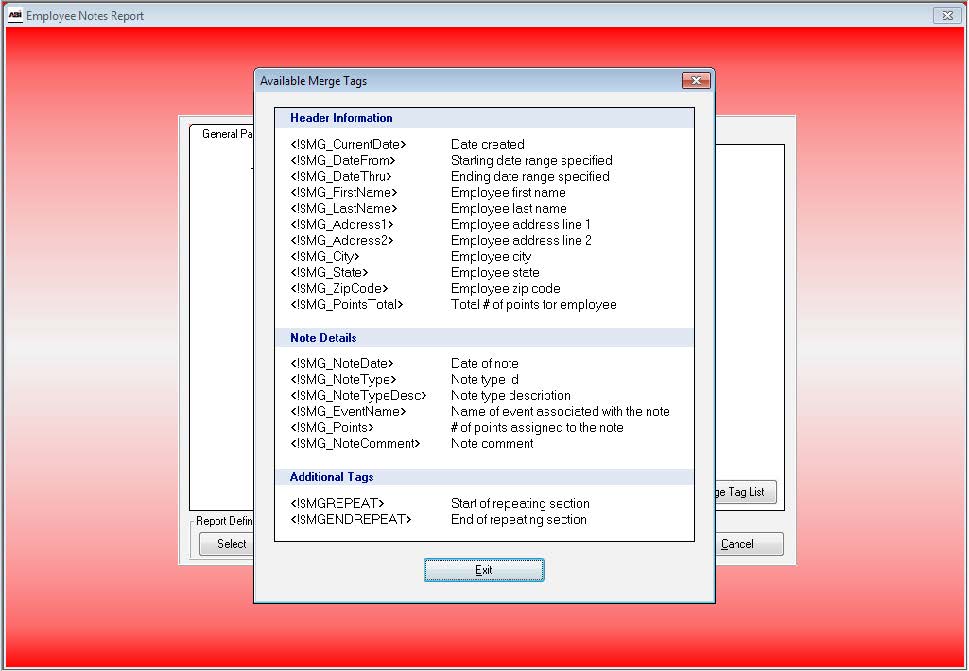
Image 6
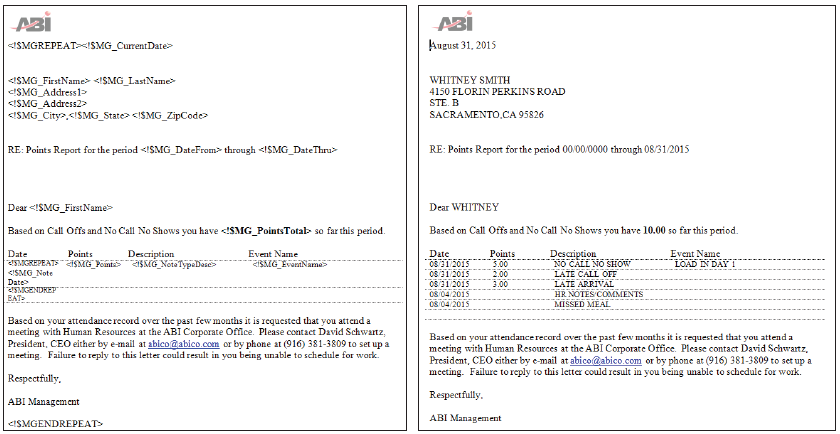
Image 7